3D Stereo Slide Prep
Preparing your stereo pairs correctly helps us keep prices low and quality high. Follow these steps for the best results, and see our repair page if your slides are damaged or in glass.
1) Clean the Films Gently (We Scan What You Send)
Decades of storage can leave a thin, greasy dust that won't blow off. Use a very soft, clean, lint-free cloth to lightly wipe each film surface. Do not use liquids or solvents.
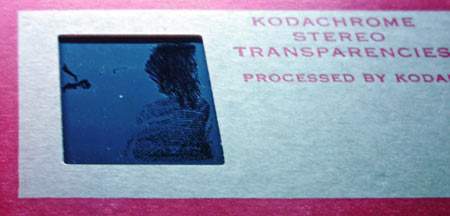
Before: dust/film visible
The light area is stuck-on dust; the dark smudge shows where it was rubbed. Please clean slides prior to shipping.

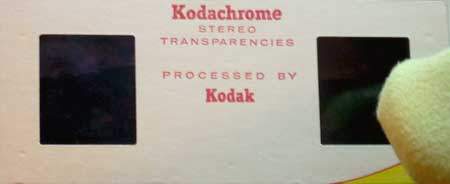
After: gently wiped clean
A quick, gentle wipe greatly improves scan quality.
Use a very soft, lint-free cloth
2) Tell Us Which Side to Use
Prefer one side of the pair over the other? Cover the bad side's film window with a small Post-it that does not overlap the mount edges. If needed, add a small piece of removable tape to keep the Post-it from lifting.
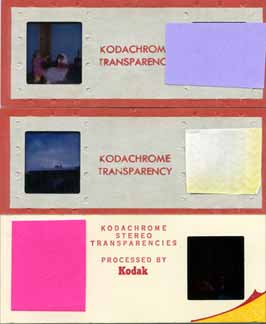
Mark the side we should ignore
3) Stack and Secure Without Warping
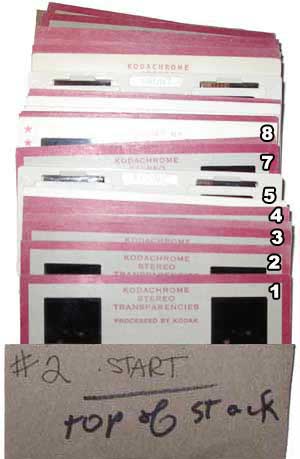
Arrange slides in neat stacks and number the stacks. Avoid tight rubber bands—they can bend or warp mounts. If you must band them, place sturdy cardboard on both sides of the stack first. Rigid envelopes are often safer.
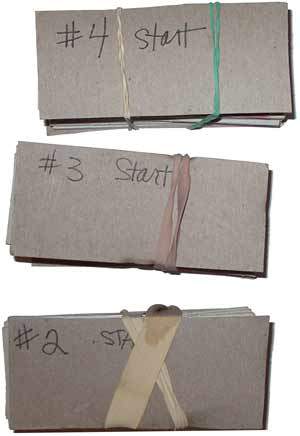
Stacks should be numbered
4) Numbering & Orientation (Logo Side Up)
- Number on the logo side of each slide. The logo side should face up in your stack.
- Slide #1 in a stack should be the top slide.
- As a rule of thumb: if you put a slide into a viewer, the side that would face you should be down in the stack.
Number on the logo side (logo side up)
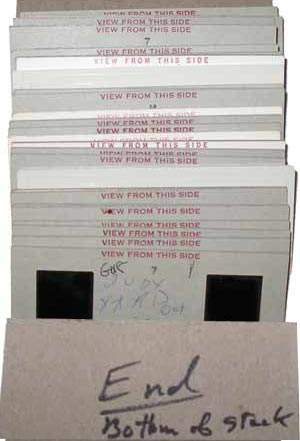
Example stack (viewed from the bottom)
5) Do Not Cut the Pair
Stereo pairs must remain in their original two-frame assembly. Cutting does not reduce cost and makes scanning more difficult. Please send the pair intact.
Keep the two-frame assembly intact
Notes About This Service
- We actively provide 3D stereo slide scanning. This page describes how to prepare your slides for our current workflow.
- We scan the side you indicate as "good." We do not scan both sides of each pair.
- If you do not indicate the side you like best, we will decide.
- Have damaged or glass-mounted slides? See our repair guidance below.
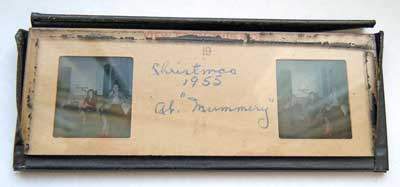
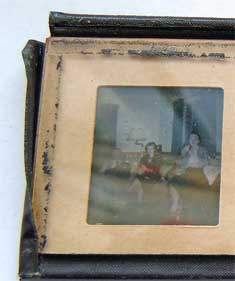
Glass-mounted example (needs prep)
If tape is lifting or the glass is separating, the film assembly must be removed before scanning. We can do this prep for an additional fee.