How to Tell Slide Fronts from Backs

Every 35mm slide has a FRONT and a BACK, and every slide in your stack needs to face the same way — FRONT up — before it's scanned. Here's the simple way to tell them apart, with real photo examples.

Two things, not one: Facing your slides FRONT-up (this page) and rotating them to landscape (see our Orientation & Rotation guide) are both required. Getting one right doesn't cover the other.

Determine Front and Back

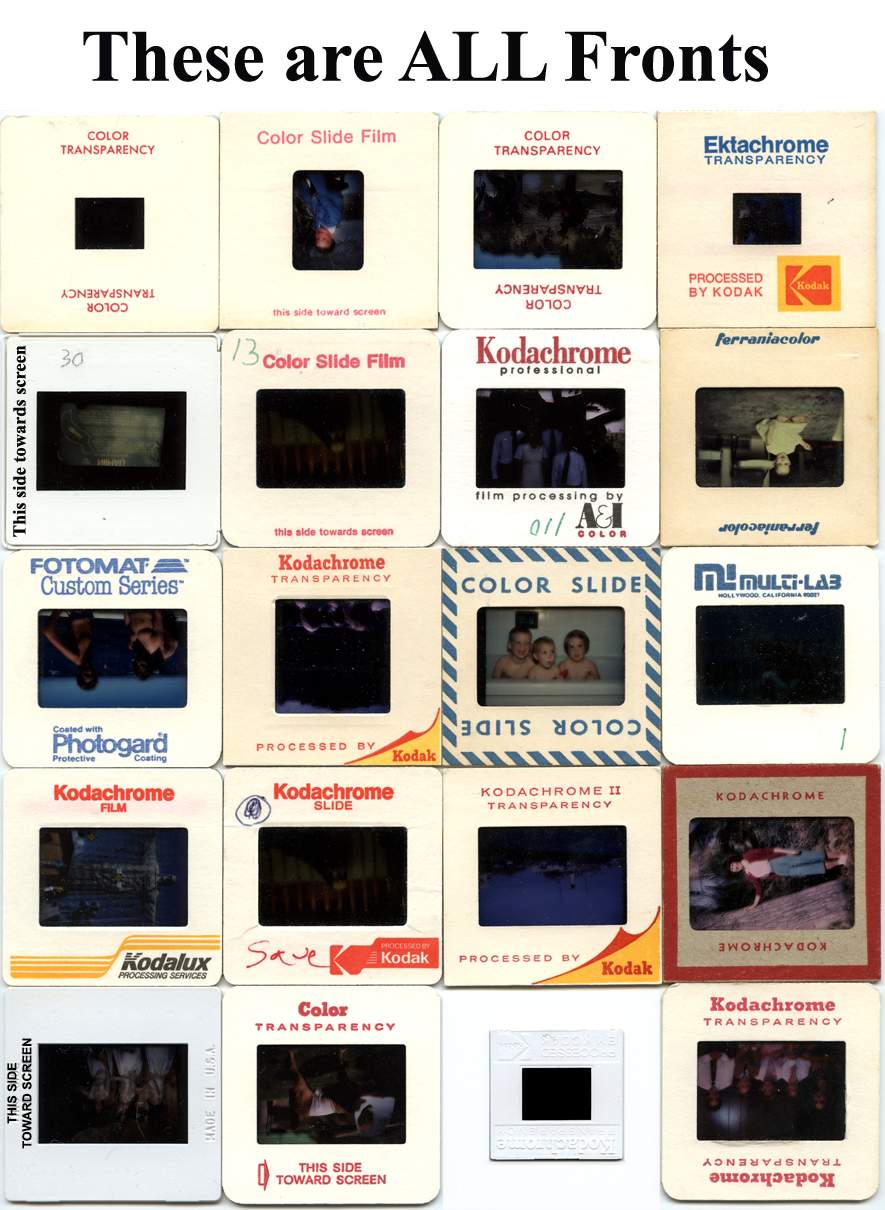
  1. The FRONT — 99.9% of the time, the side with the most colorful printing and text is the FRONT. This is standard for slides processed in the US. Film processors print their logo, film type, and processing information on the front.
  2. The BACK — The back usually has minimal printing — maybe a date stamp, slide number, or handwritten notes. This is where people typically write their own labels or descriptions.
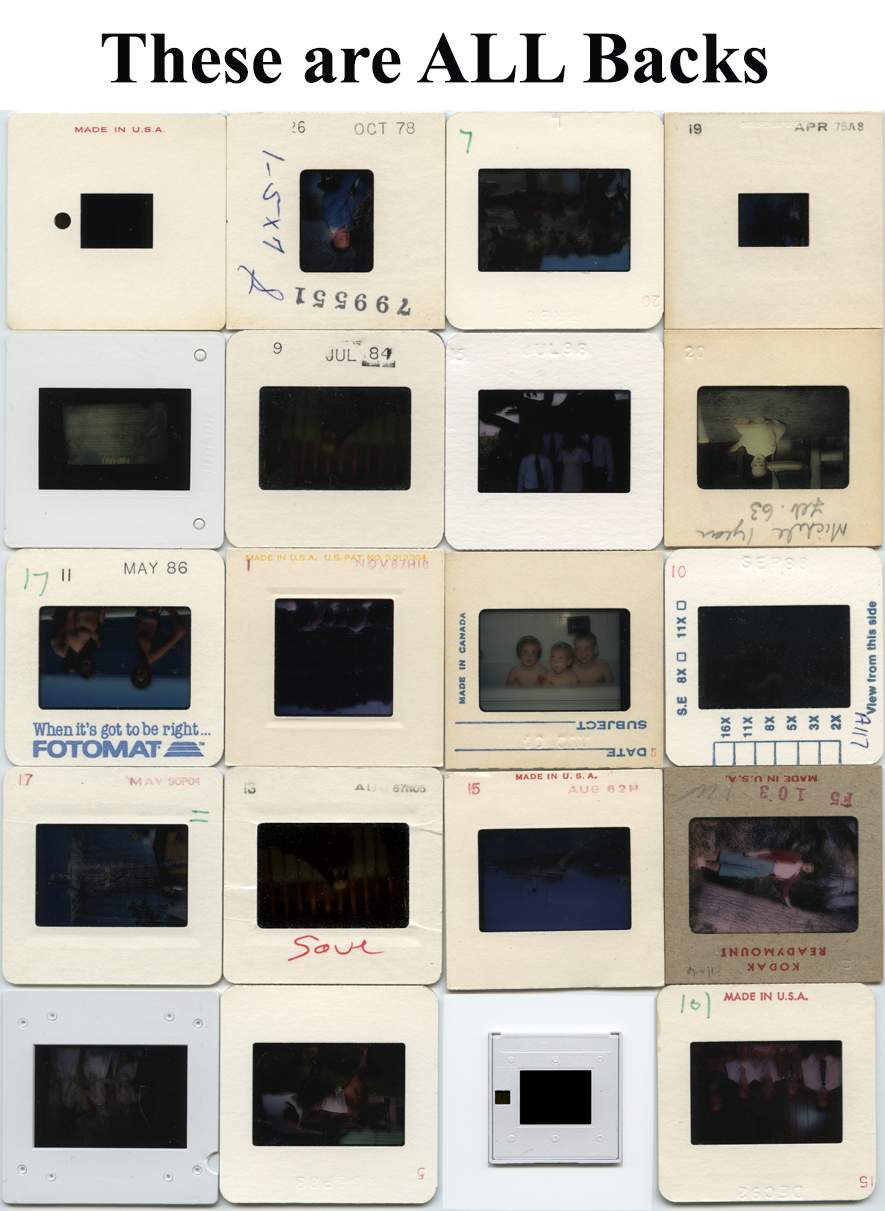
Slide Backs
Examples of slide backs showing minimal printing
When viewed THROUGH the BACK, numbers and lettering read correctly. This side usually has minimal printing.
Slide Fronts
Examples of slide fronts showing colorful processor printing
Fronts have colorful printing and may be labeled “This side toward screen.” Stack with this side facing UP.
Bigger Stacks Are Better
Comparison showing good stacks vs bad stacks
Create stacks of 20+ slides rather than many tiny stacks. This saves time and keeps your images organized the way you want them.
Rotate to Landscape Too — Both Matter!
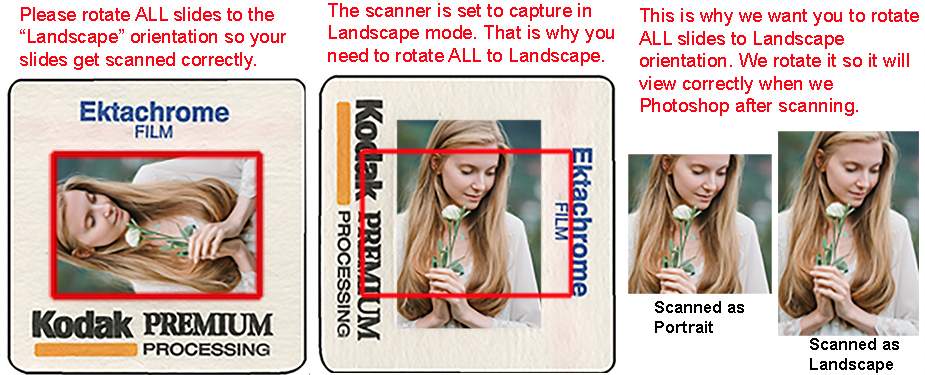
Diagram showing portrait slide rotated to landscape orientation
Rotate “portrait” slides to “landscape” orientation to avoid cropping heads off. We'll rotate them back correctly during editing — but the front-up rule on this page still applies to every slide, rotated or not.
Watch: How to Stack Your Slides

We will rotate final images correctly — you just need fronts up and stacks even.

Animated demonstration of rotating and stacking slides correctly
This animation shows the complete process: rotate to landscape, ensure fronts face up, and stack in groups of 20+. For tall stacks, split them into 2a, 2b, 2c.
Plastic and Cardboard: Keep Separate
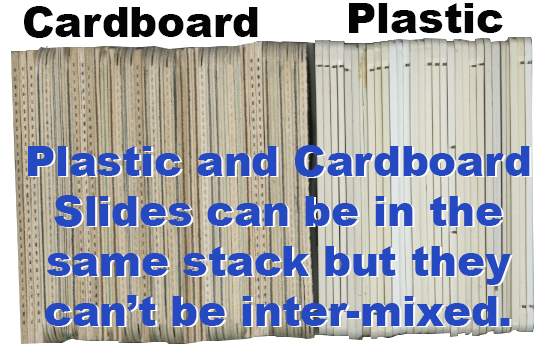
Diagram showing plastic and cardboard slides grouped separately
Plastic and cardboard slide mounts can be in the same numbered group, but please don't intermix them. Group all plastic together, then all cardboard together.
Kodak Carousel Trays Are Fine!
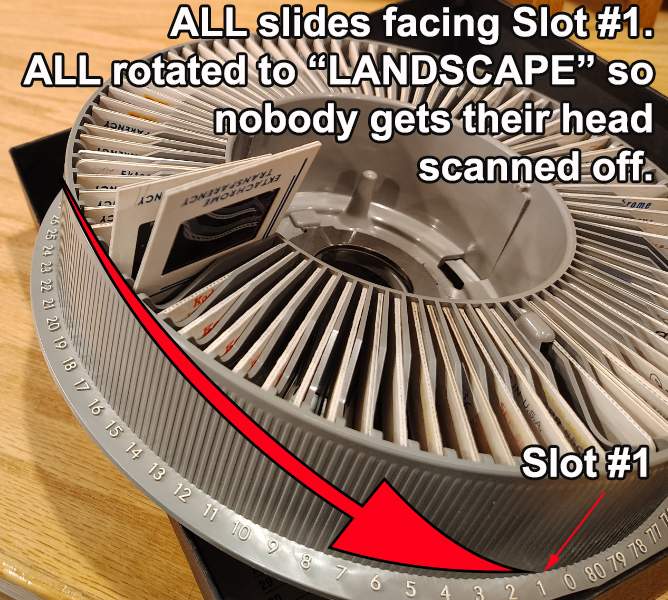
Kodak carousel tray viewed from front showing proper orientation
View from FRONT looking CLOCKWISE: All slides rotated to landscape, all fronts facing toward slot #1. This is the correct setup!
Carousel Tray: Back View
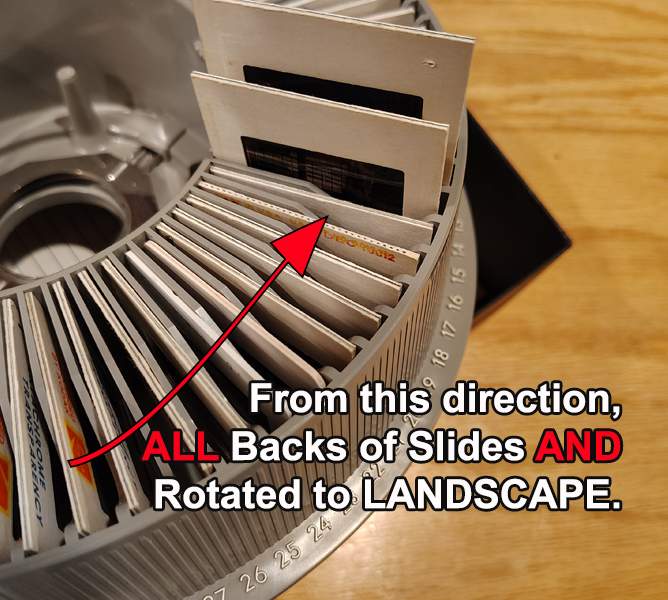
Kodak carousel tray viewed from back showing slide backs
View from BACK looking COUNTER-CLOCKWISE: You should see only the BACKS of slides, all rotated to landscape orientation. All fronts face toward slot #1.

Quick Answers

Which side of a 35mm slide is the front?
99.9% of the time, the side with the most colorful printing and text — the manufacturer logo, film type, and processing information — is the front.

Do I need to rotate my slides AND flip them?
Yes. Rotating (turning a vertical slide sideways to landscape) and flipping (making sure the front faces up) are two separate, equally important steps.

What if I can't tell which side is the front?
Compare your slide to the photos above. If you still can't tell, do your best — if we catch a slide facing the wrong way, we can flip or rotate it as needed.

Ready to Send Your Slides?

Once your slides are stacked with fronts up and rotated to landscape, you're ready to go.

Start Your Order